The AI assistant is available in Smart Support plugin version 2.0.0 or higher. This guide explains how to enable Smart Support’s optional agent AI features and use them safely on ticket screens.
What the AI assistant does
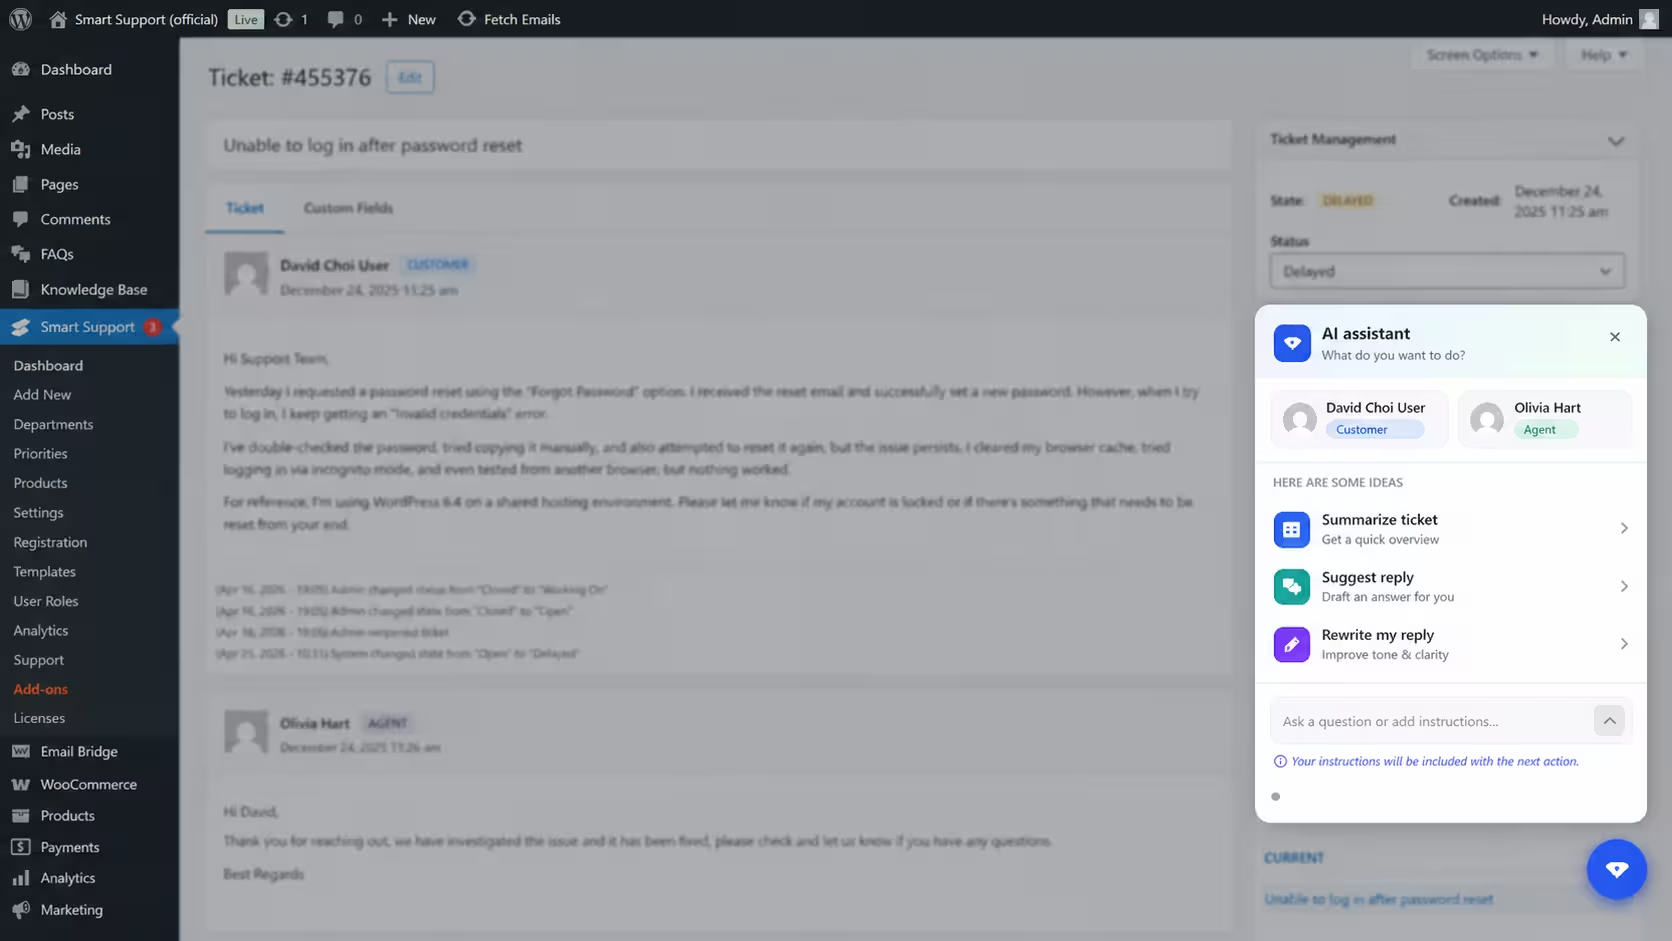
On an individual ticket screen in the WordPress admin area, agents can open the floating AI assistant panel.
The assistant can help with:
Summarize ticket
Creates a short overview of the full ticket thread so agents can quickly understand the issue.
Suggest reply: Drafts a plain-text reply based on the customer’s latest message. Agents must review and edit the reply before sending it.
Rewrite my reply: Improves the tone, clarity, and structure of a reply that has already been typed in the reply editor. A preview is shown before the rewritten version is applied.
Custom prompts and questions: Agents can type extra instructions into the prompt box before using summarize, suggest, or rewrite.
Configure AI in WordPress
- Sign in as a WordPress user who can manage Smart Support settings.
- Go to Smart Support → Settings → Advanced.
- Open the AI sub-tab.
- Enable Enable AI features.
- Complete the AI provider settings:
API base URL
Enter the root URL for your provider’s API. Smart Support calls: {API base URL}/chat/completions
The provider must support an OpenAI-compatible chat completions API.
API key
Enter the secret API key from your AI provider. The key is stored in your WordPress database. Treat database backups and exports as confidential.
Model
Enter the exact model name required by your provider.
Examples:
-
gpt-4o-minigpt-4.1-mini- The model name shown in your provider dashboard
- Save the settings.
If an API key has already been saved, the password field may appear empty. Leave it blank to keep the existing key, or use Clear the saved key to remove it before saving.
Use AI on a ticket
- Open a ticket in the WordPress admin area.
- Click the floating AI button.
- Choose one of the available actions:
-
- Summarize ticket
- Suggest reply
- Rewrite my reply
You can also type into the prompt box before choosing an action.
When the prompt box contains text and an action is selected, the text is treated as additional instructions.
Example: Keep the reply short and professional.
When you use the send button without choosing an action, Smart Support treats the prompt as a question about the ticket thread.
Example: What is the customer asking for?
For Rewrite my reply, type your reply in the main reply editor first. Then open the AI panel and choose Rewrite my reply.
For suggested or rewritten content, always review the preview before inserting or applying it. Agents are responsible for checking accuracy, tone, and policy compliance before sending anything to a customer.
Agents only receive AI responses for tickets they are allowed to access.
Privacy and data flow
When an agent uses AI, your WordPress server sends relevant ticket content to the AI endpoint configured in Smart Support.
Depending on the selected action, this may include:
- Ticket thread text
- The agent’s draft reply
- Extra instructions typed into the prompt box
- Free-form questions about the ticket
This data is sent to the configured HTTP endpoint, not to Smart Support directly. Before enabling AI, review your provider’s terms, retention policy, and data processing rules.
Customers are usually not notified automatically when an AI tool is used. Follow your organisation’s disclosure and privacy policies.
API key providers
Smart Support expects an OpenAI-compatible /chat/completions endpoint using Bearer authentication.
Use the provider that fits your compliance, pricing, and hosting requirements.
| Provider | Typical use | Links |
|---|---|---|
| OpenAI | Official GPT models | API keys |
| Microsoft Azure OpenAI Service | Enterprise Azure deployments | Azure OpenAI authentication, Azure AI Foundry |
| Google AI Studio / Gemini | Gemini models with OpenAI compatibility | API keys, OpenAI compatibility docs |
| Anthropic Claude | Claude models, usually through a compatible gateway | API keys |
| Mistral AI | Mistral-hosted and open-weight model options | Mistral console |
| Groq | Fast inference for supported models | API keys |
| Together AI | Hosted open models | Together AI |
| OpenRouter | One key for many model providers | OpenRouter, API keys |
| DeepSeek | DeepSeek chat models | DeepSeek platform |
| xAI | Grok and related APIs | xAI console |
| Perplexity | Search-augmented API | Perplexity API settings |
| Local or self-hosted | Ollama, vLLM, LiteLLM, or similar | Use a local server that exposes /v1/chat/completions, such as an OpenAI-compatible Ollama or LiteLLM endpoint |
/v1.For example, a local OpenAI-compatible endpoint might look like: http://localhost:11434/v1
If you receive a 401 error, check the API key and account permissions.
If you receive a 404 error, check the base URL, model name, and whether the provider supports /chat/completions.