Email Bridge
How to Connect Microsoft 365 / Outlook to Email Bridge
This guide will help you connect your Microsoft email (Outlook, Hotmail, Live, or Microsoft 365) to the Email Bridge plugin.
No technical knowledge required. Just follow the steps below.
Before You Start
You need:
- A Microsoft email account (Outlook.com, Hotmail.com, Live.com, or Microsoft 365 work account)
- Access to this link: 👉 https://entra.microsoft.com/
- The Microsoft OAuth settings page inside your Email Bridge plugin
Step 1 – Create Microsoft App Registration
- Open this link: https://entra.microsoft.com/
- Sign in with your Microsoft email.
- Click App registrations on the left side menu.
- On App registrations Page, click New Registration

Fill in the Form
Name
Enter: Email Bridge Integration
Supported Account Types (Important)
Choose from the available option, if you are unsure, select: Accounts in any organizational directory and personal Microsoft accounts
Select Web
Redirect URI:
You will copy this from WordPress:
- Go to WordPress
- Email Bridge → Integration → Add Account
- Select Outlook / Microsoft 365
- Select Modern Authentication (OAuth 2.0)
- Copy the Redirect URI shown there
- Paste it into Azure (choose Web type)
This allows both personal and business accounts to connect.
Click Register.
Step 2 – Copy Client ID
After registering, you will see: Application (client) ID, Copy this value.
Now go to: Email Bridge → Microsoft 365 OAuth Configuration
Paste it into the Client ID field.
Step 3 – Create Client Secret
On the same page you will see client credentials option: Click on Add a certificate or secret.
-
Click on Add a Certificates & secrets
-
Add description: Example, Email Bridge Secret
-
Choose expiry (24 months recommended)
-
Click Add
Important: Copy the Value immediately & Paste it into the Client Secret field in your plugin.


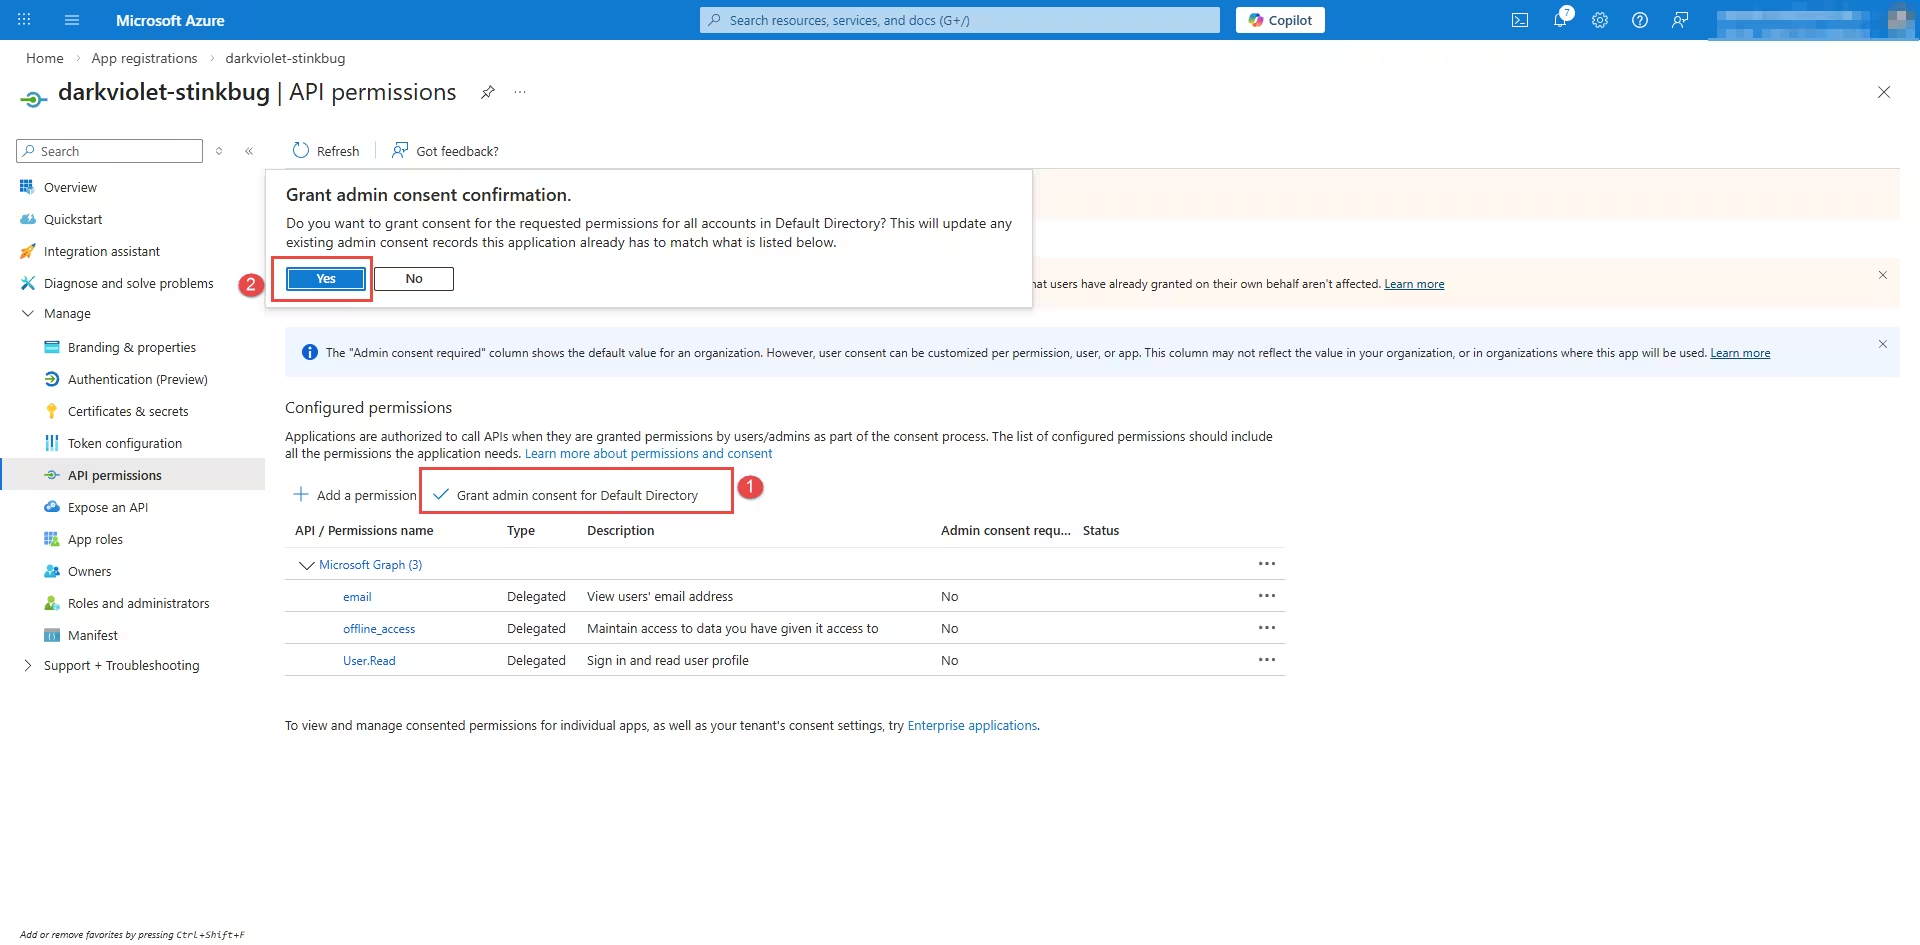
Step 5 – Add API Permissions
This section is important as this will allow email fetching.
-
Click API permissions
-
Click Add permission
-
Select Microsoft Graph
-
Choose Delegated permissions
Search and add: Mail.Read, User.Read, offline_access, openid, profile
Click Add permissions


Step 6: Now, Add the Mailbox in WordPress
- Log into WordPress Admin
- Go to Email Bridge → Integration
- Click Add New Account
Fill in:
Account Name: i.e, Microsoft 365 Support Mailbox
Email Address: Your Personal or company email address, i.e. support@yourcompany.com
Email Provider: Select Outlook / Microsoft 365
Authentication Method:
Choose: ✅ Microsoft 365 Modern Authentication (OAuth 2.0)
Now enter:
Tenant:
Use your Tenant ID for Organization (recommended)
Or If You Use a Personal Outlook Account (Outlook.com, Hotmail.com, Live.com) Enter: consumers
If You Use a Business Microsoft 365 Account Enter: common
Client ID: Paste from Azure
Client Secret: Paste the Secret VALUE from Azure
Leave Redirect URI as-is (it fills automatically).
Scroll down:
- Set Sync Frequency (every 10 minutes recommended)
- Check Active
Click Add Account
STEP 7 – Connect Microsoft 365
After saving:
- Click Edit on your account
- Click Connect Microsoft 365
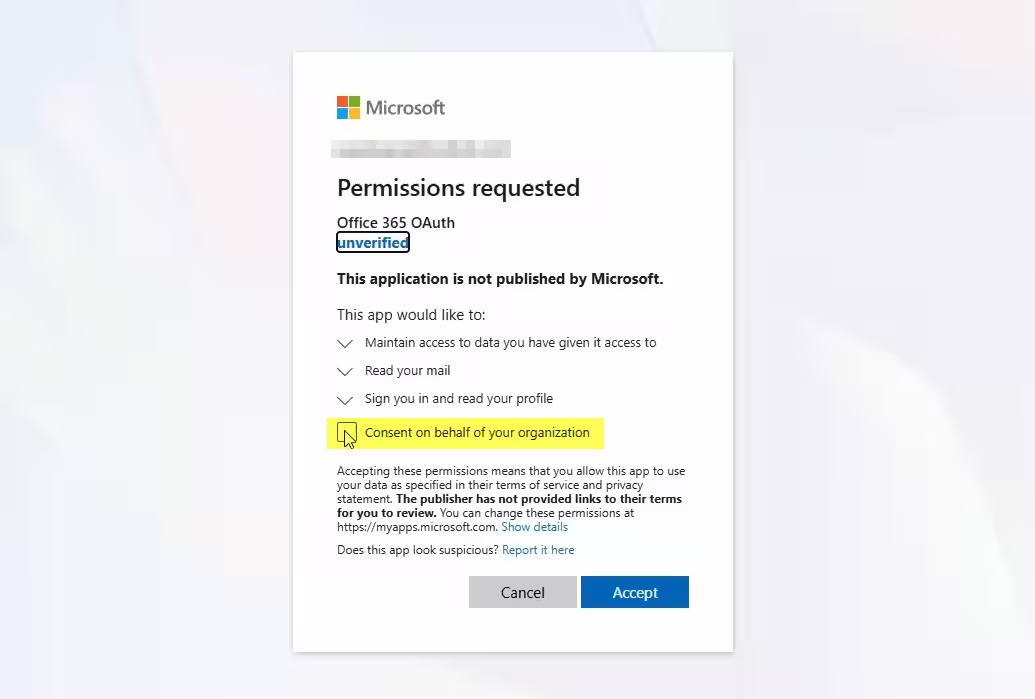
You will be taken to Microsoft login.
- Sign in
- Complete MFA if asked
- Click Accept
You will return to WordPress.
You should now see:
✅ Connection Status: Connected
STEP 8 – Test Ticket Creation
- Send a test email to your support mailbox
Subject:Test Ticket - In WordPress:
Email Bridge → Integration → Click Fetch Now - Go to:
Smart Support → Tickets
You should see your test email as a new ticket. 🎉 Setup complete!